What is a Shared Testing Inbox?
A shared testing inbox is any Mockmail inbox that multiple users in your organization can access. When you share an inbox, team members can:
- View all captured test emails in real time
- Inspect HTML previews, plain text, headers, and raw source
- Download or view attachments
- Forward emails to external addresses for review
- Delete individual emails or clear the entire inbox
Who can access shared inboxes: All users belong to an organization in Mockmail. Once invited and registered, team members can be granted access to specific inboxes by an administrator. Access is managed per-inbox, so you can keep some inboxes private while sharing others with specific team members or the entire team.
How Team Invites Work in Mockmail
Before you can share inboxes, you need to invite team members to join your Mockmail organization.
Who Can Send Invites
Only users with the admin or owner role can invite new team members. If you created the Mockmail account, you automatically have owner permissions.
Sending an Invitation
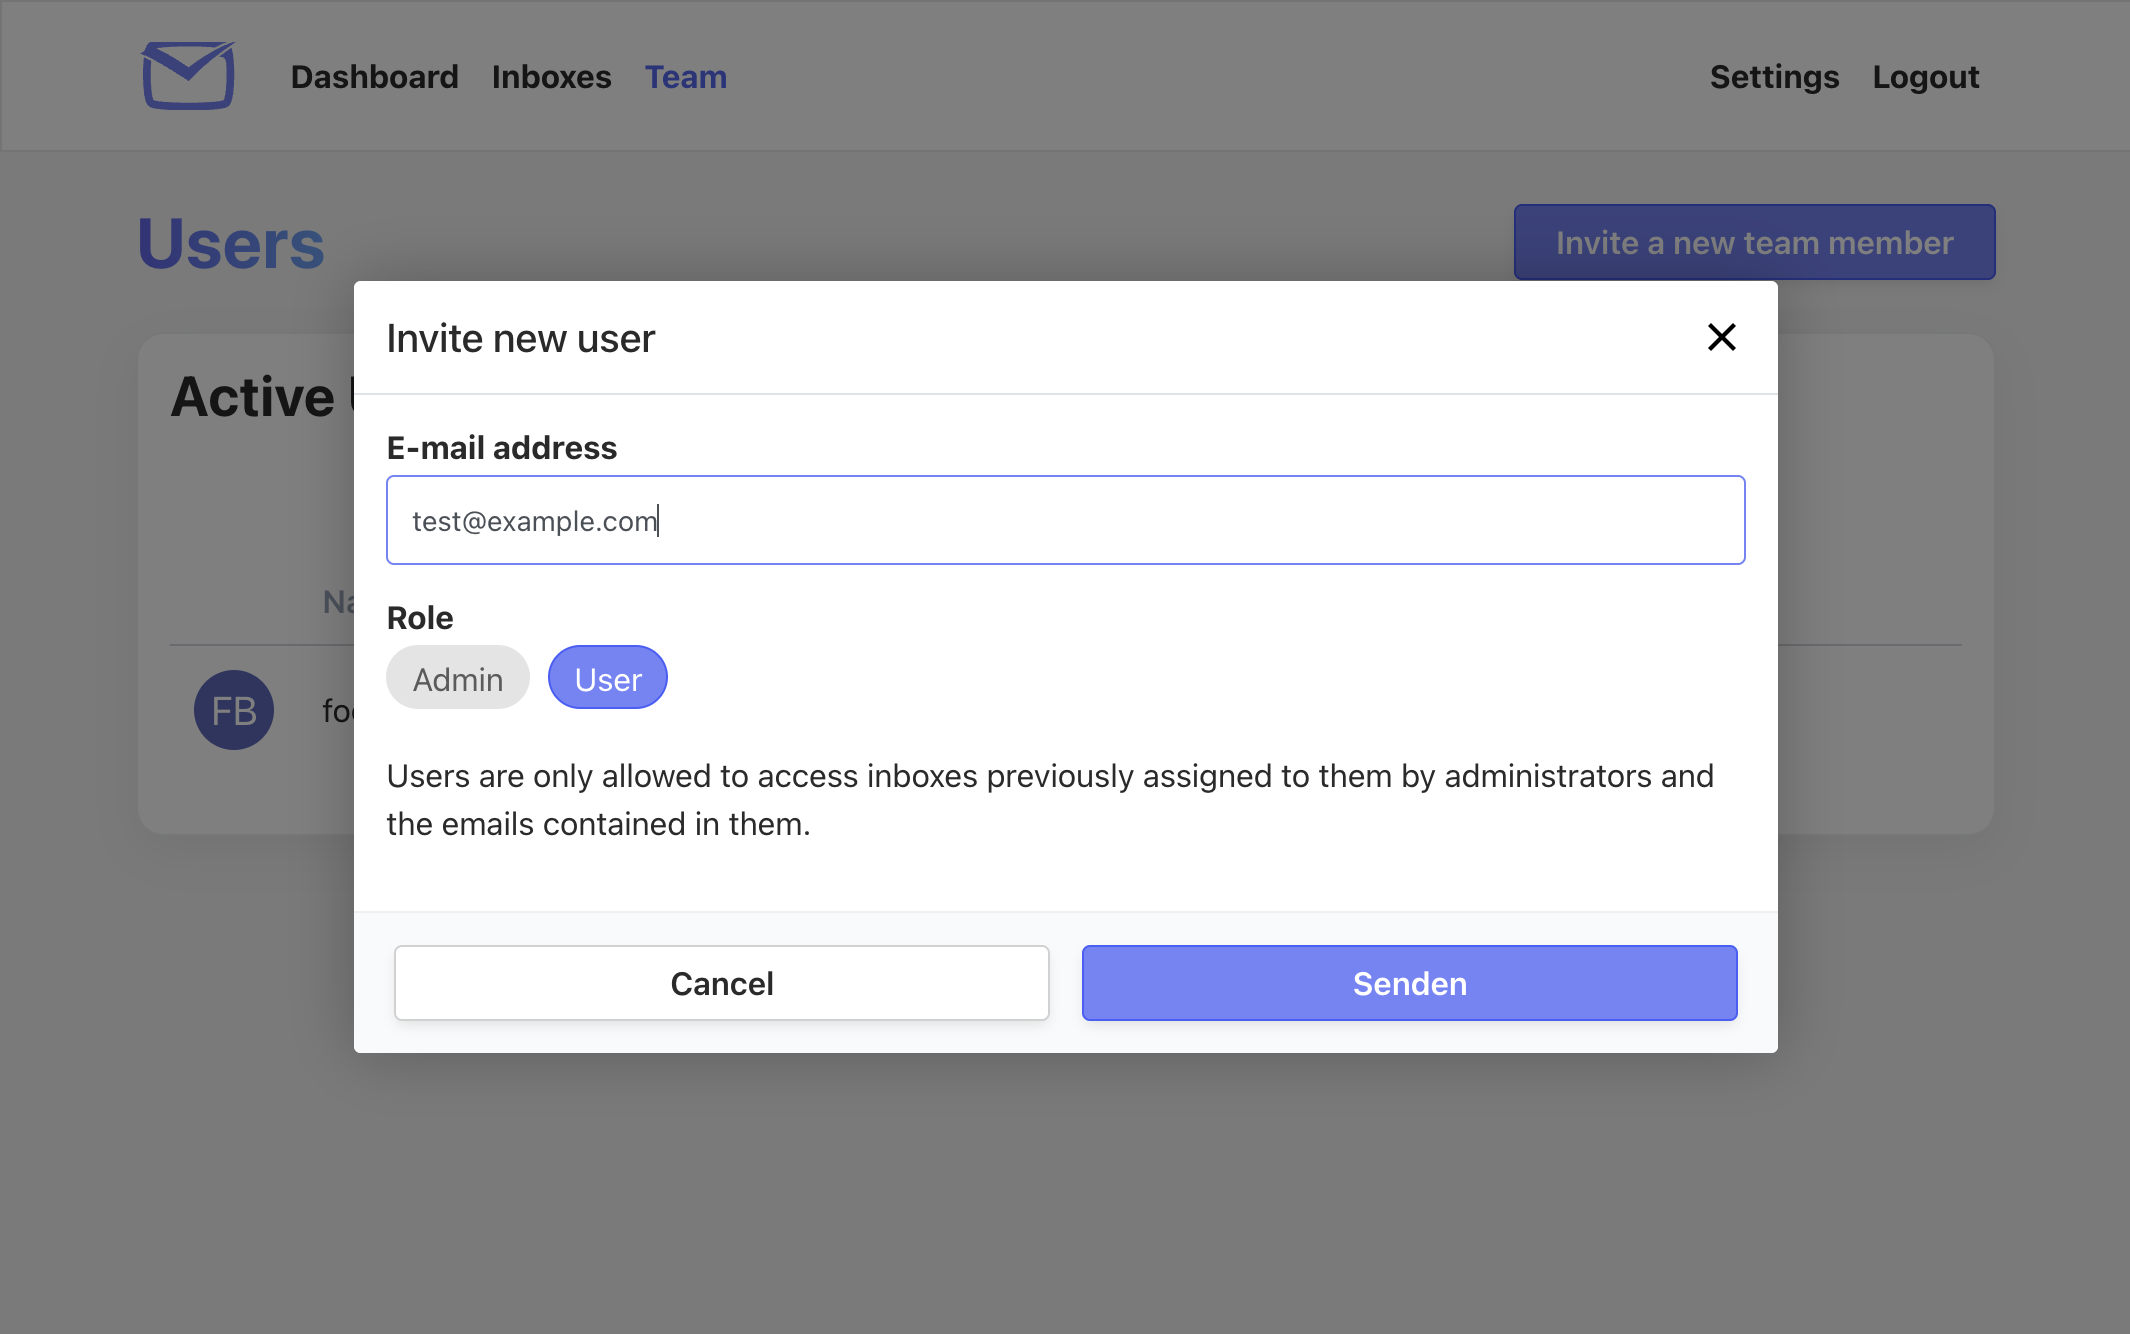
- Navigate to your Team page in the Mockmail dashboard
- Click "Invite Team Member" and enter the email address
- Select a role (Admin or User):
- Admin: Can invite users, manage team members, configure inbox access, and create/delete inboxes
- User: Can access shared inboxes but cannot manage team or settings
- Click "Send Invite" - an email will be sent to the recipient
Invitation Delivery and Acceptance
When you send an invite, Mockmail delivers an email to the recipient with the subject "You have been invited to Mockmail" and a registration link.
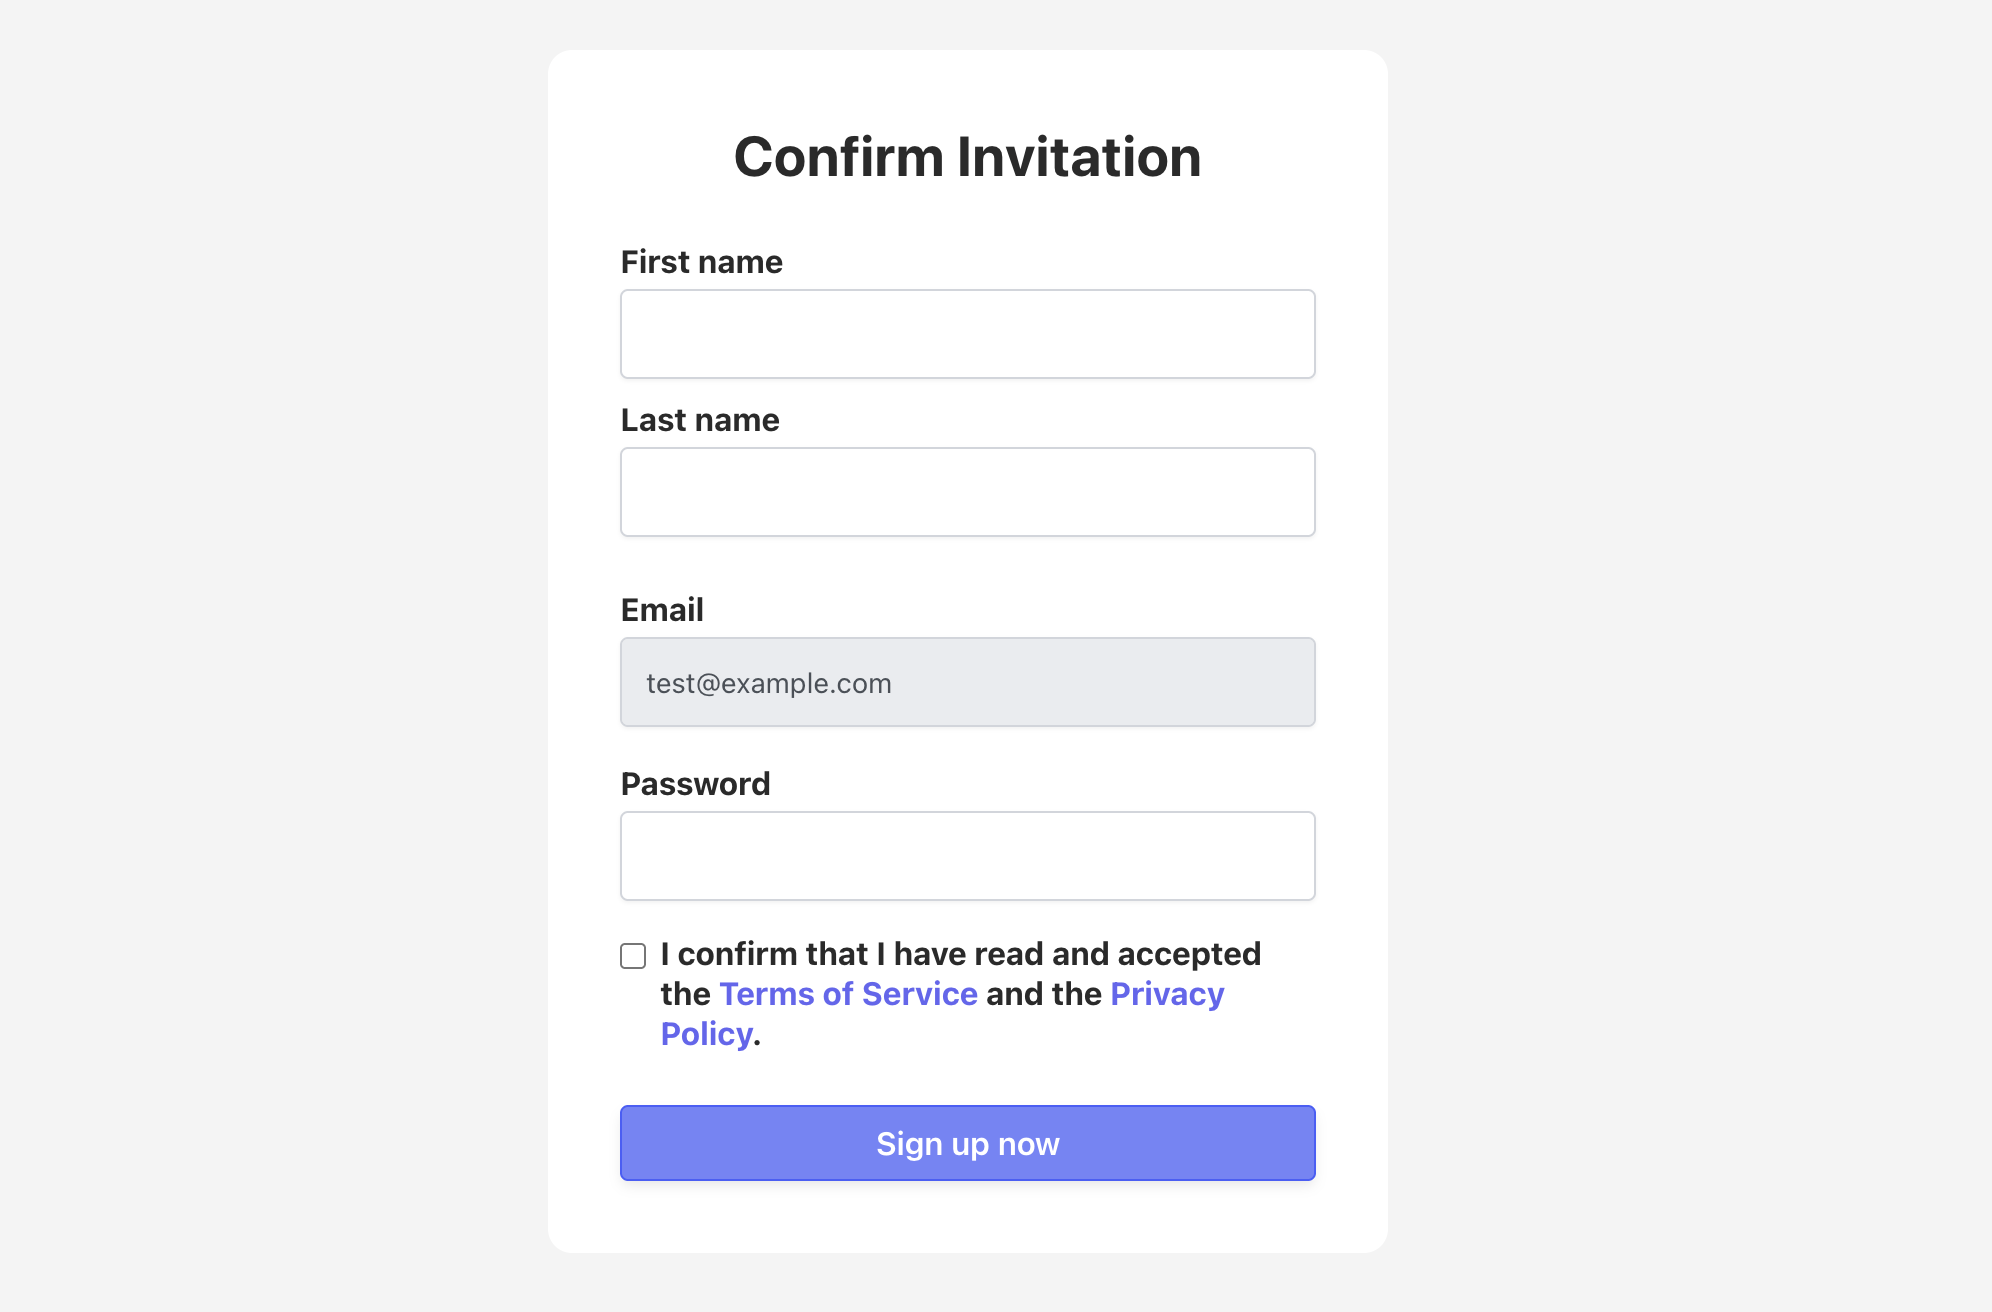
Accepting an invitation: When the invitee clicks the link, they see a registration form asking for:
- First name and last name
- Email address (pre-filled with the invited email)
- Password
After submitting the form, the new user is automatically created within your organization with the role you specified. The invitation is deleted upon acceptance, and the user is logged in immediately.
Managing Pending Invitations
In the Team settings page, you can view all pending invitations along with:
- The invited email address
- Who sent the invitation
- When the invitation was created
Admins can resend an invitation (if the original email was lost) or delete an invitation to revoke access before acceptance.
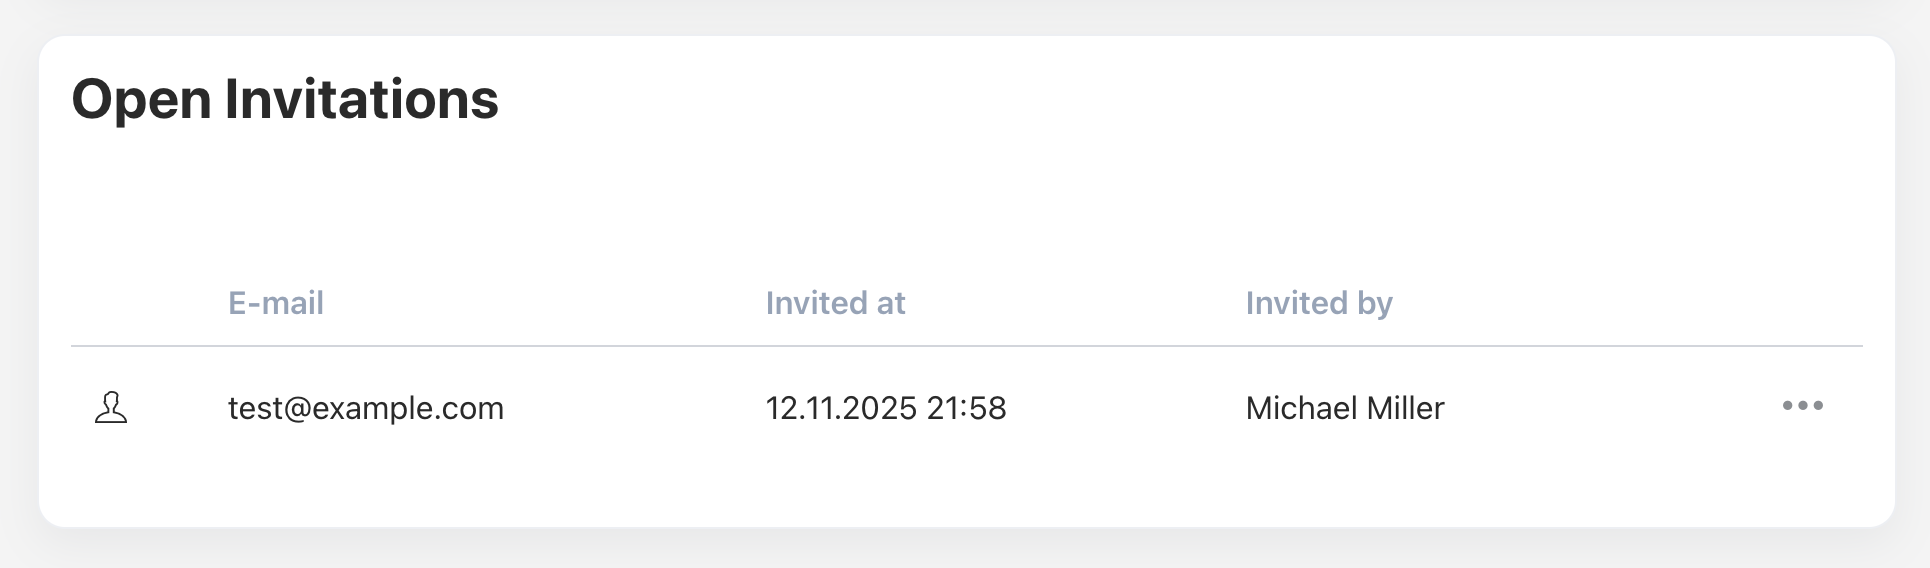
Note: Invitations do not expire. They remain valid until accepted or manually deleted by an admin.
Managing Inbox Access for Team Members
Once team members have accepted invitations and joined your organization, admins can grant them access to specific inboxes. Mockmail provides two ways to manage access:
Per-User Access Management
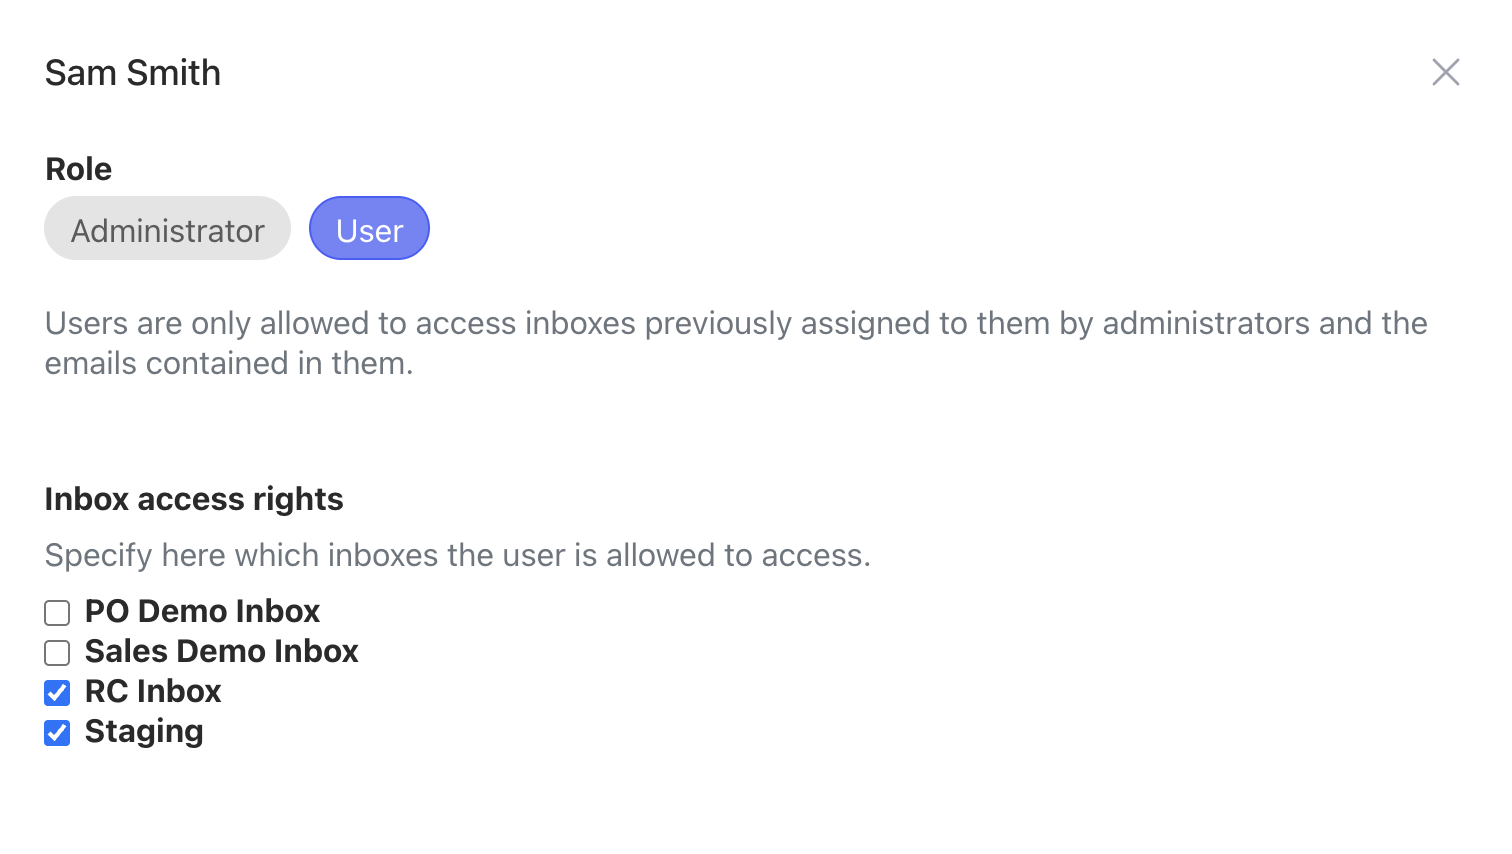
View and configure which inboxes a specific user can access:
- Go to Team settings
- Click on a team member's name
- You'll see a list of all inboxes with checkboxes
- Check the boxes for inboxes this user should access
- Save changes
This approach is ideal when onboarding a new team member or auditing a specific user's access.
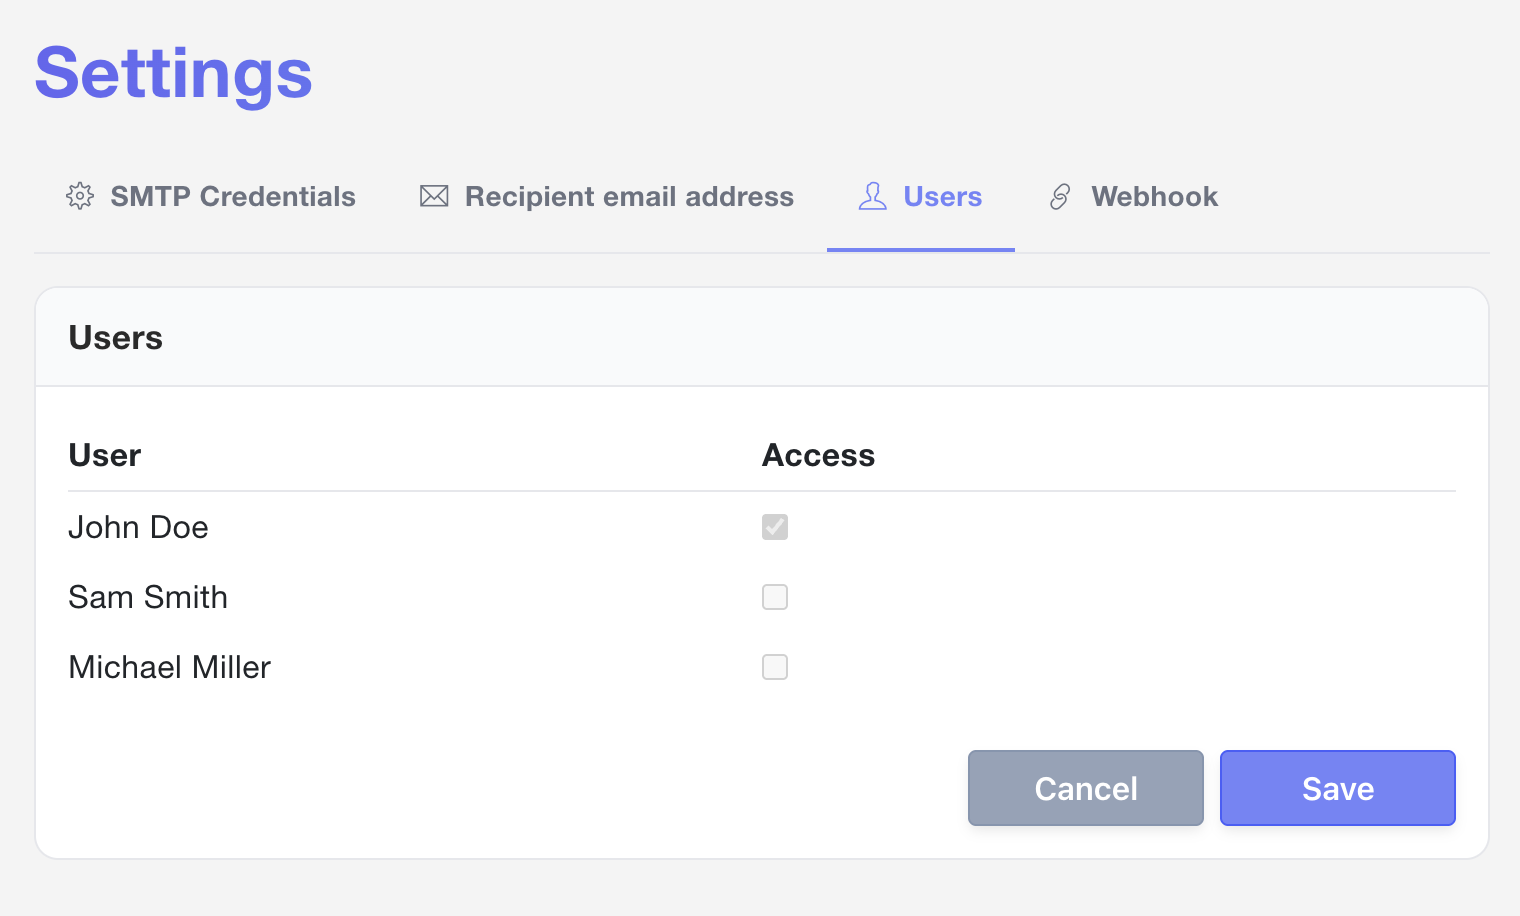
Per-Inbox Access Management
View and configure which users can access a specific inbox:
- Navigate to an inbox in your dashboard
- Click "Settings" or "Manage Access"
- You'll see a list of all team members with checkboxes
- Check the boxes for users who should access this inbox
- Save changes
This approach is ideal when setting up a new inbox for a specific project or team.
Removing Access
To remove a user's access to an inbox, simply uncheck their name in either the per-user or per-inbox access settings and save. The user will immediately lose access to that inbox.
Removing Team Members
Only the owner can delete team members. When a user is deleted, all their inbox access entries are automatically removed. To remove a team member:
- Go to the Team page
- Click on the user
- Select "Delete User"
Working Together in a Shared Inbox
Once an inbox is shared, all users with access can collaborate effectively.
Viewing Test Emails
All team members see the same emails in real time. When your application sends a test email to the inbox's SMTP credentials, it appears immediately for everyone with access. Users can:
- Click any email to view the HTML preview
- Switch to plain text or raw source views
- Inspect headers, SPF, DKIM, and ARC authentication details
- Search and filter emails by subject, recipient, or content
Forwarding Emails
Any user with access to an inbox can forward individual emails to external addresses. This is useful for:
- Sharing examples with stakeholders outside Mockmail
- Testing real email delivery without reconfiguring SMTP
- Sending samples to designers or copywriters for review
Forwarding preserves the original email content and attachments.
Webhook Forwarding and Integrations
If an inbox has a webhook URL configured, all incoming emails are automatically forwarded as JSON payloads to that endpoint. This setting is inbox-level (not per-user), so webhook integrations work the same for all team members.
Common use cases:
- Triggering automated tests when emails arrive
- Posting notifications to Slack or Microsoft Teams
- Populating test databases with email data
Best Practices for Teams
Organize by project or environment: Create separate inboxes for staging, QA, and development, then share each with the relevant team members.
Use descriptive inbox names: Name inboxes clearly (e.g., "Staging - User Onboarding", "QA - Password Resets") so team members know which inbox to check.
Limit access to sensitive flows: If an inbox receives emails with sensitive test data, only share it with team members who need access.
Set retention limits: Configure inbox retention limits to automatically clean up old test emails and keep shared inboxes manageable.
Troubleshooting
Invitation Email Not Received
Problem: The invitee didn't receive the invitation email.
Solutions:
- Ask the invitee to check their spam or junk folder
- Verify the email address was entered correctly
- Resend the invitation from the Team settings page
- If the invitation was sent a long time ago, delete it and send a fresh one
"You Don't Have Permission" Error
Problem: A user tries to access an inbox but sees a permission error.
Causes and solutions:
- User hasn't been granted access: Admin needs to add this user to the inbox's access list
- User belongs to a different organization: Inboxes can only be shared within the same organization - invite the user to your organization first
- User is trying to manage settings: Only admins can modify inbox settings - if the user needs admin access, an owner must update their role
Can't See Inbox After Accepting Invitation
Problem: New user registered successfully but sees no inboxes.
Solution: The user has joined your organization but hasn't been granted access to any inboxes yet. An admin needs to configure inbox access for this user (see "Managing Inbox Access" above).
Frequently Asked Questions
How many team members can I invite?
There is no hard limit on the number of users per organization. Check your Mockmail plan details for any account-level user limits.
Can I assign different roles for different inboxes?
No. Inbox access is binary (access or no access). Roles (owner, admin, user) are organization-level and apply to all team management and settings, not per-inbox permissions. All users who have access to an inbox have the same capabilities within that inbox.
What happens to shared inboxes if I remove a user?
When an owner deletes a team member, that user's access to all inboxes is automatically revoked, and they can no longer log in. Emails in shared inboxes are not affected.
Do invitations expire?
No. Invitations remain valid until they are accepted or manually deleted by an admin.
Can I change a user's role after they've joined?
Yes. Admins can update a team member's role (user or admin) from the Team settings page. Only owners can promote users to owner or demote other owners.
Is there an audit log for shared inbox activity?
Currently, Mockmail does not track per-user actions within shared inboxes. All users with access have equal permissions, and there is no timestamp or activity log for who viewed, deleted, or forwarded emails.
Complete Workflow Example
Here's a typical scenario for setting up team collaboration:
Scenario: Frontend developer needs QA access to staging inbox
1. Administrator Actions
- Click Team → Invite user
- Enter QA tester's email:
qa@company.com - Select role: User
- Click Send Invitation
2. QA Tester Actions
- Check email inbox for invitation
- Click registration link
- Create Mockmail account with name and password
3. Administrator Follow-Up (for User role)
- Open the Frontend Staging inbox
- Click Settings → Users
- Find
qa@company.comin the user list - Check the box in the Access column
4. Result
The QA tester can now independently inspect form submissions, password resets, and notification emails in the Frontend Staging inbox without interrupting the development workflow.
Tip: If you invite someone as an Administrator, skip step 3—they automatically have access to all inboxes.